In this tutorial, we will learn how to create and activate delivery routes in Yaku.
Before we begin, we want to clarify that delivery routes are the distribution paths assigned to delivery personnel for product deliveries, while orders are product requests from customers.
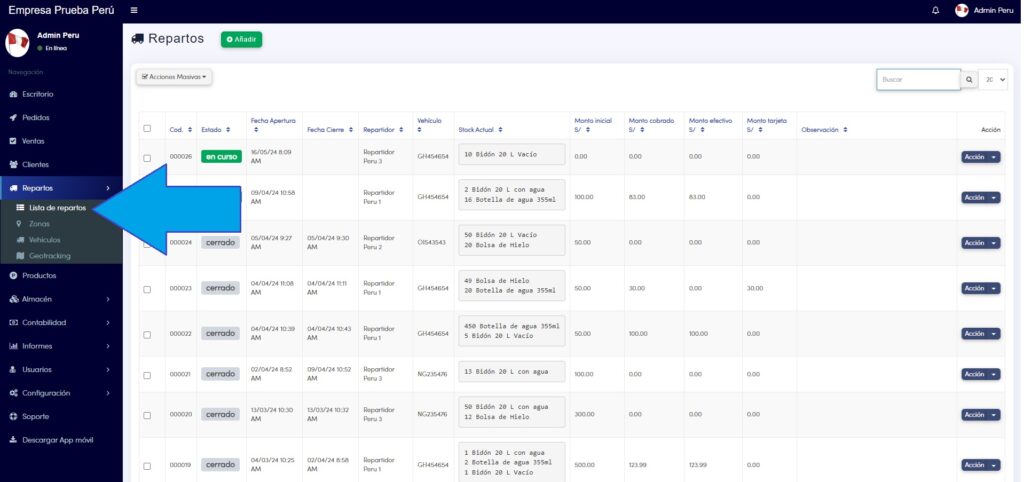
- To create or view the status of delivery routes, go to the “Delivery Routes” module, click and select the “List of Delivery Routes” option from the dropdown list:
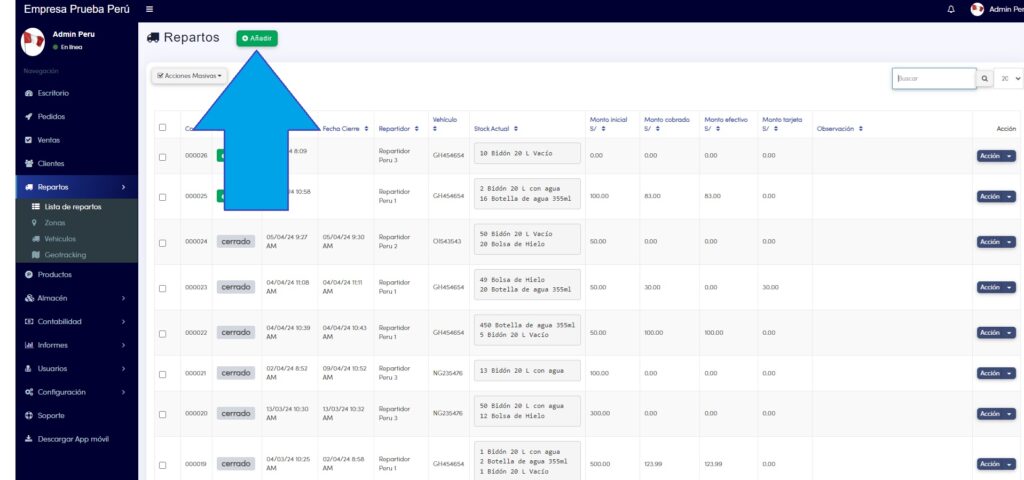
2. To create a new delivery route, click on the “Add” button to be directed to the delivery route creation form:
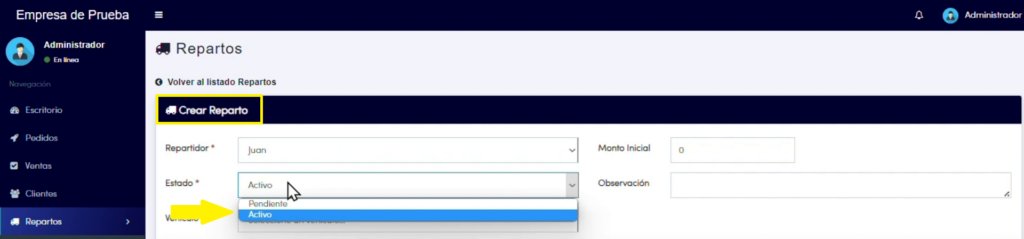
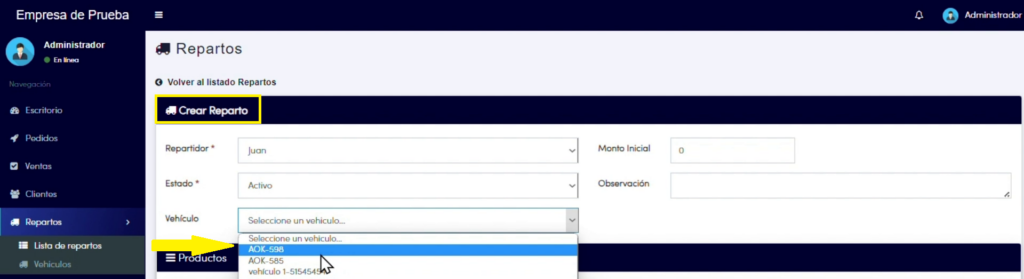
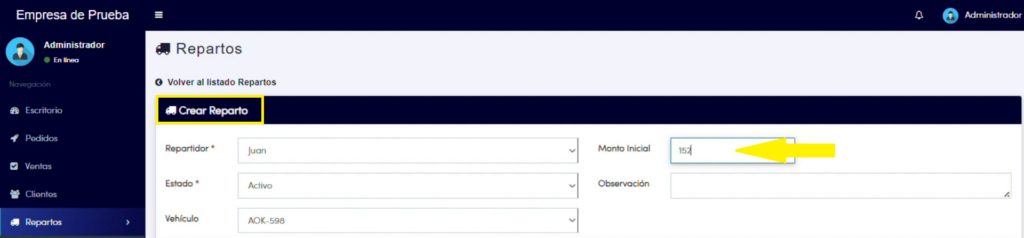
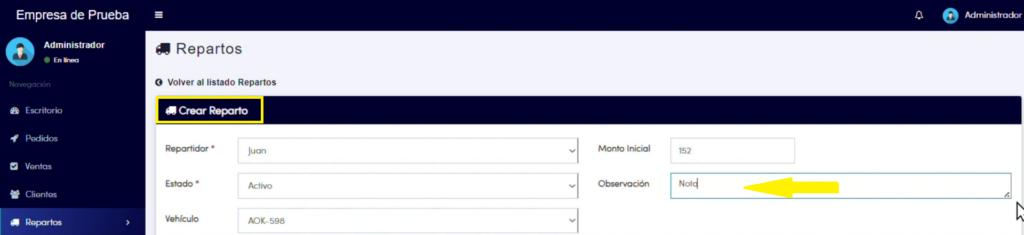
3. Complete each of the fields on the “Configure your Delivery Route” screen:
– Delivery Person: Select from the dropdown list of delivery personnel the one you want to assign this route to.
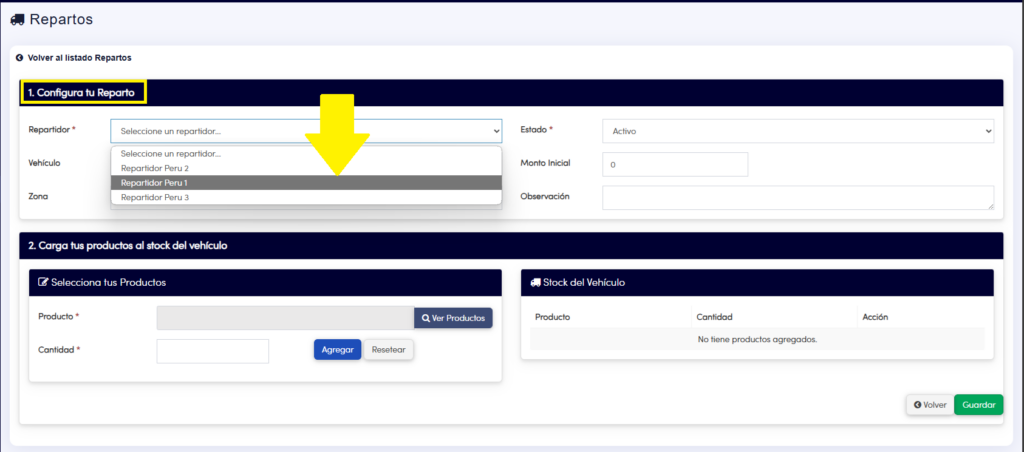
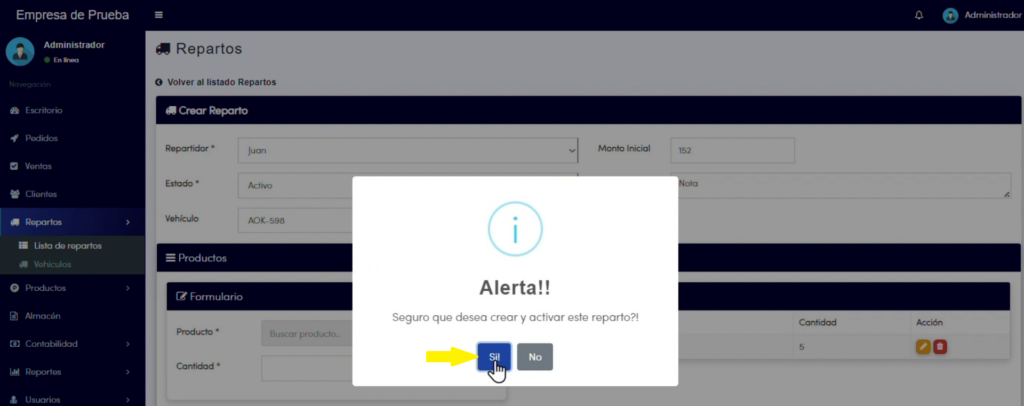
– Status: If the delivery route is not yet ready to start, choose the “Pending” option. If the delivery route has already started, select “Active”. A delivery route in “pending” status can be changed later to “active” status when its route begins.
*Note: It is essential to understand the difference between an active delivery route and a pending one. A delivery route in pending status has not yet started and will be used later, for example: A route was assigned for the afternoon shift when the morning shift is just beginning. In turn, it is essential to keep in mind that a pending delivery route is not shown in the delivery person’s mobile App; only the active route will be displayed. Therefore, only one route can be activated for each delivery person at a time.
– Vehicle: Select from the dropdown list of vehicles the one you want to assign to the delivery person for use on this route.
– Initial Amount: Indicate the initial amount of money that the delivery person will carry during the route, to give change to customers or for expenses such as fuel or others.
– Observation: Add any additional observations you wish for this delivery route.
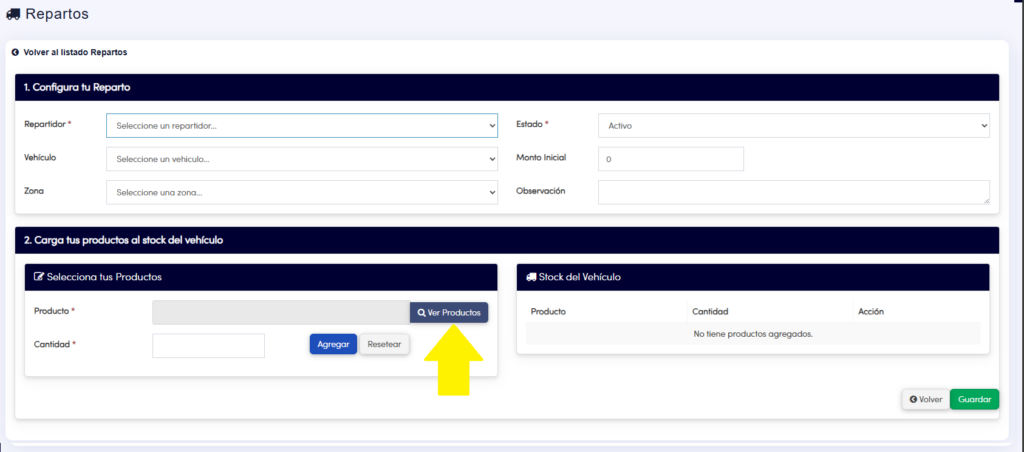
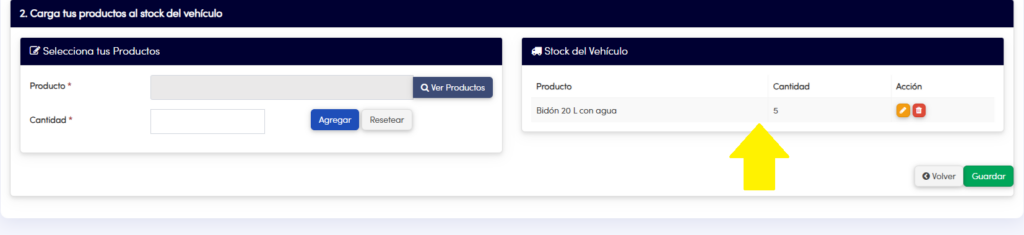
4. In the “Load your products to the vehicle’s stock” section, use the “View Products” button to select the products you want to add to the delivery route.
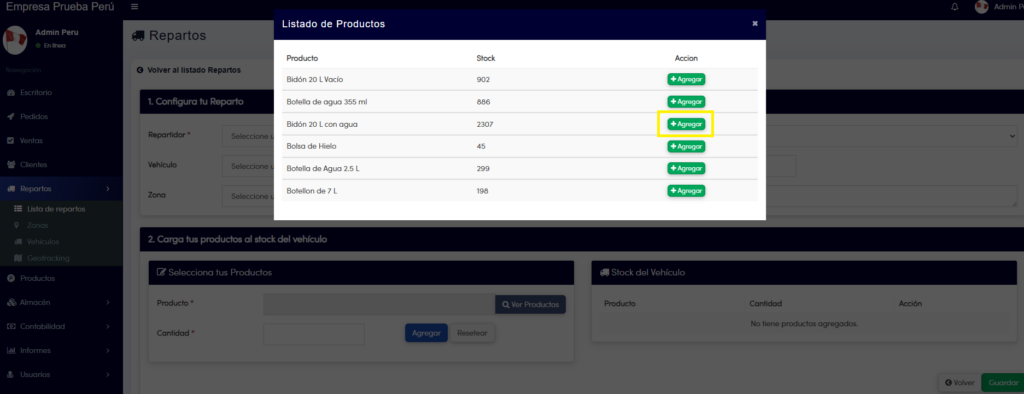
4.1. A list will be displayed with all available products and their stock (if a product has no stock, it will not appear in the list). To add, press the “+Add” button.
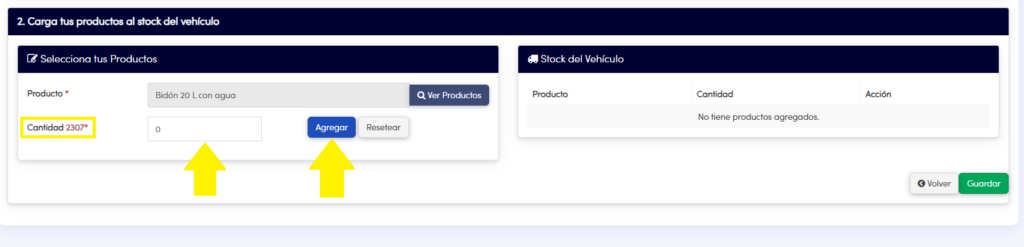
4.2 Then you must specify the quantity of the selected product to add to the delivery route. To continue, press “Add” for that quantity of product to the delivery route.
*Note: Make sure not to exceed the quantity available in the warehouse (the current stock is shown next to the word quantity, and this is the amount that cannot be exceeded).
5. In “Vehicle Stock”, you can see the products assigned to the delivery route and their respective quantity. You can edit or delete products as required before saving the delivery route.
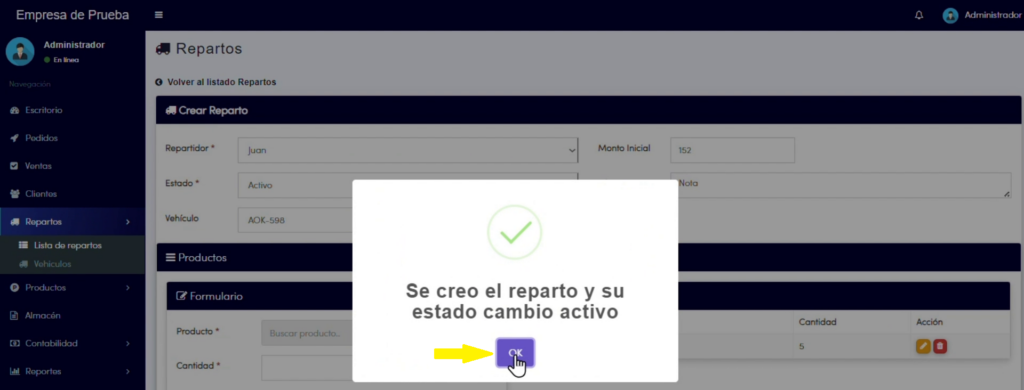
6. Once you have added the products and verified the delivery route information, click on “Save” to confirm the creation of the delivery route.