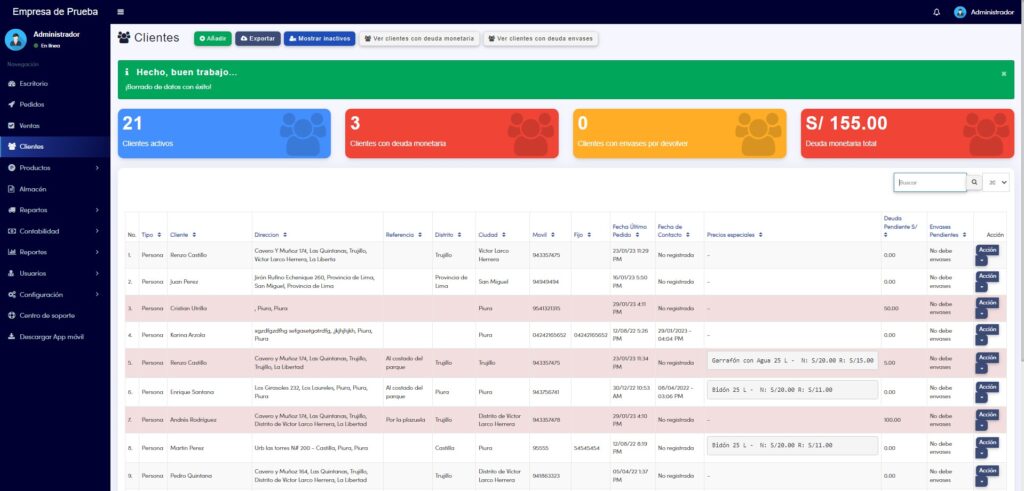
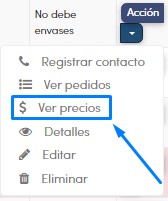
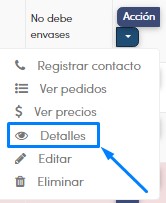
Within “Action” you will find a list of everything you can do regarding your customer.
These options are:
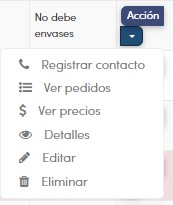
Register contact
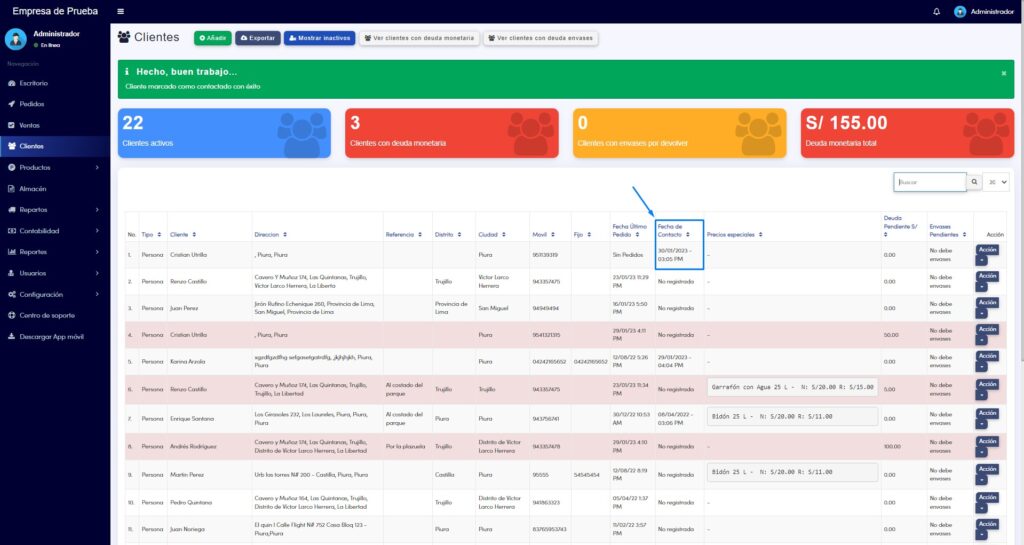
Here you can register the last contact you had with the customer, it works as follows:
First, you must click on the “Register contact” option
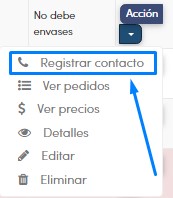
Then this popup will appear:
Where you will click “YES” if you want to register the last contact with the customer or “NO” otherwise. If you select “YES”, the following confirmation and updated contact date will appear:
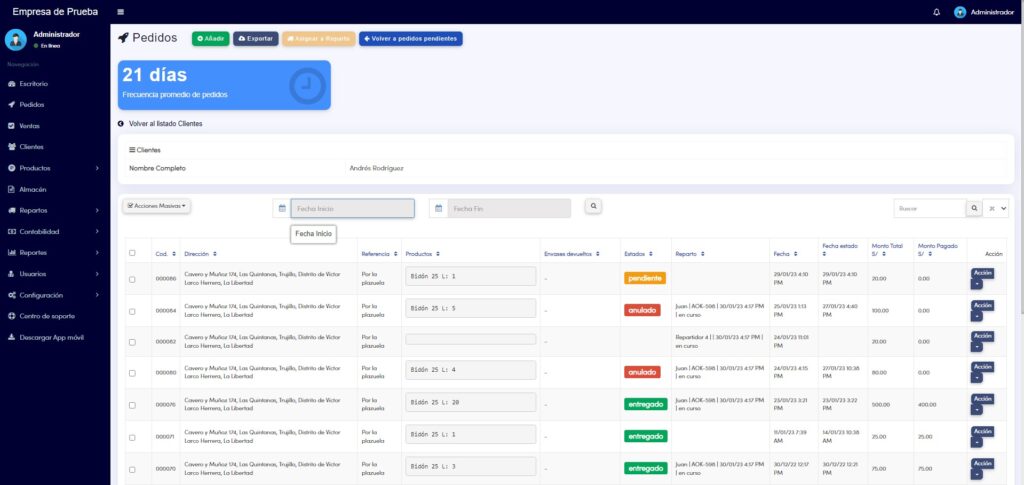
View orders
Here you can view the orders the customer had, it works as follows:
First, you must click on the “View orders” option

Then a new screen will appear with a list of the customer’s orders, with a detailed description of the order, similar to the article How do the orders and sales modules work?, apart from that you can observe an indicator of average order frequency.
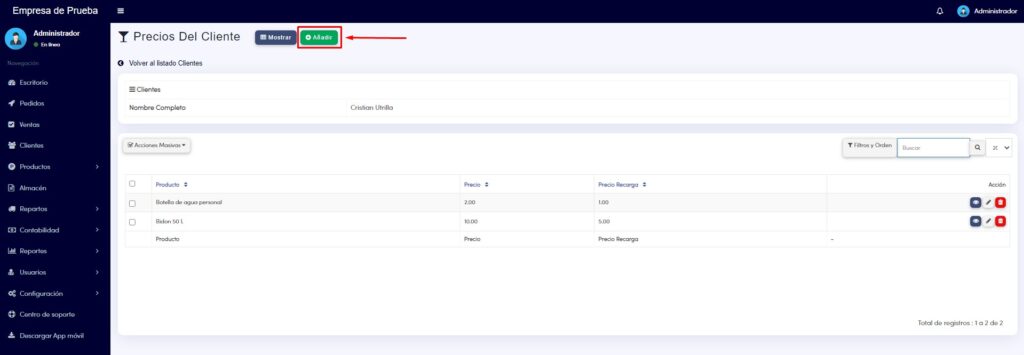
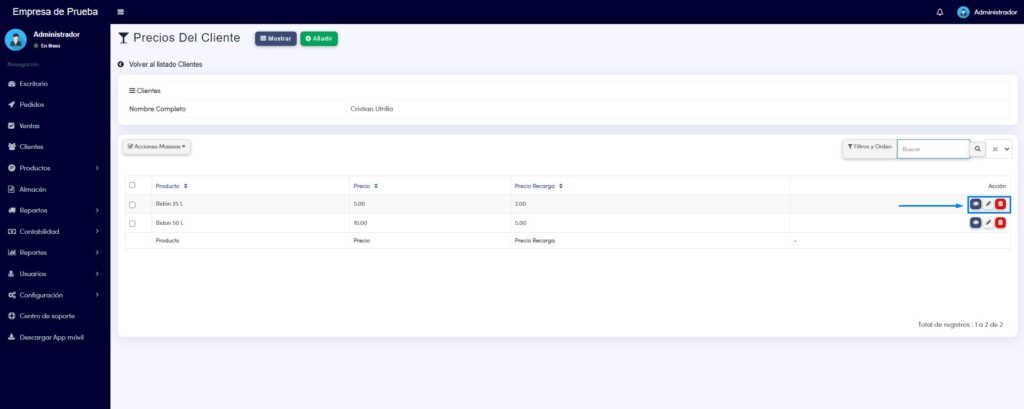
View prices
Here you can view the personalized prices the customer has, it works as follows:
First, you must click on the “View prices” option
Then a new screen will appear with a list of the customer’s prices.
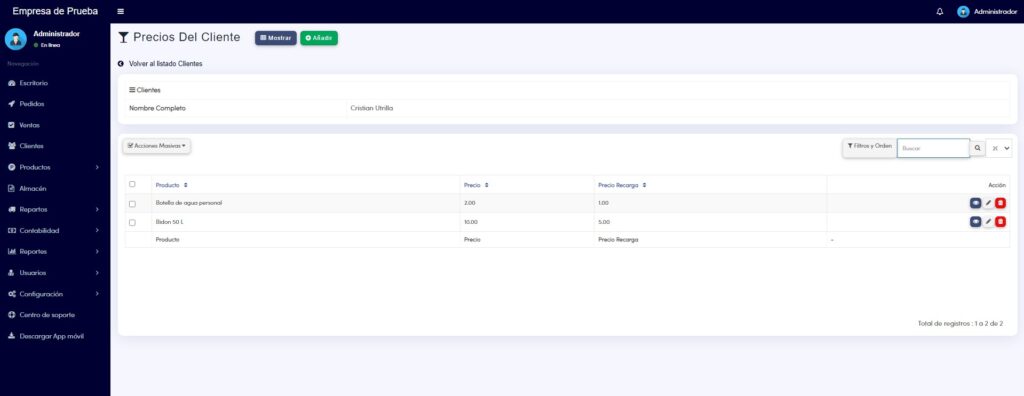
Here you have a series of actions:
– Add a personalized price for a customer.
To perform this action, we must click the “Add” button
Then the following screen will appear:
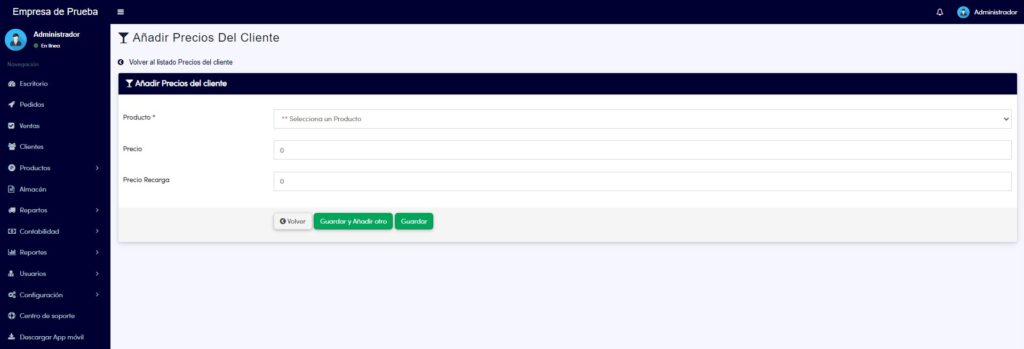
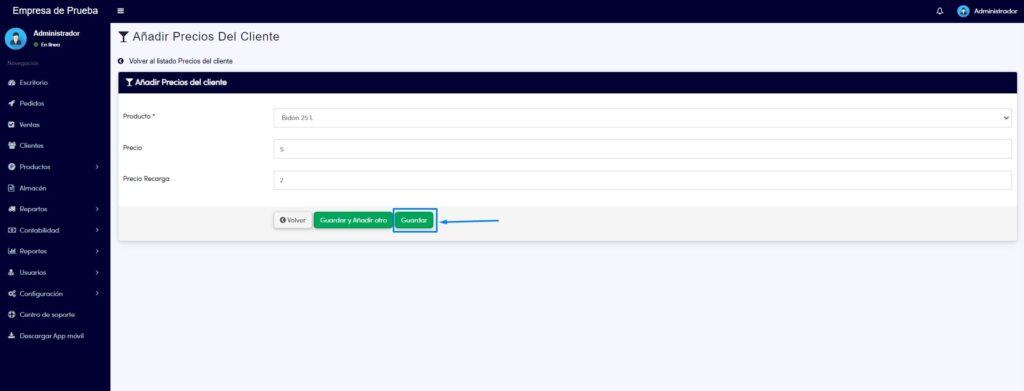
Here you will choose the product that has the personalized price for the customer, write the price of that product and also the refill price of that product for the customer. Once done, we just click on the “Save” button.
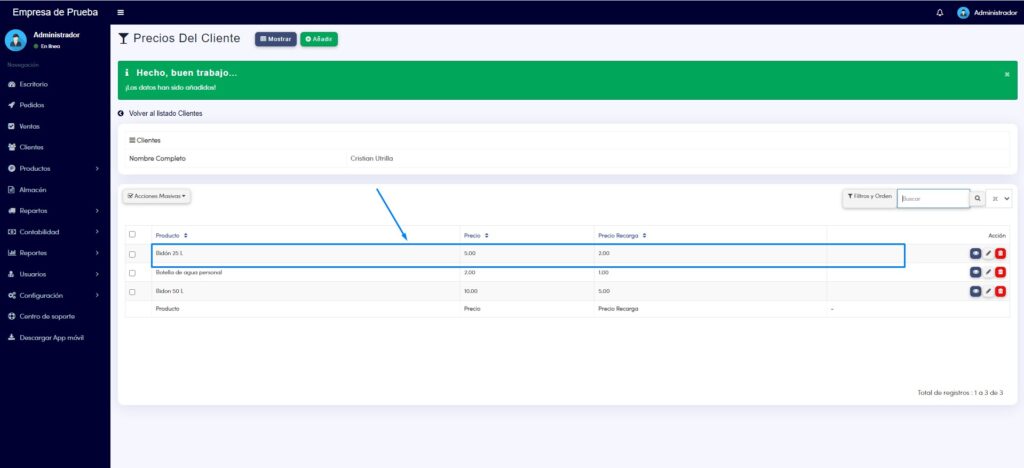
Finally, the following confirmation will appear and the new price added to the list.
– We also have the options “View details”, “Edit” and “Delete”.
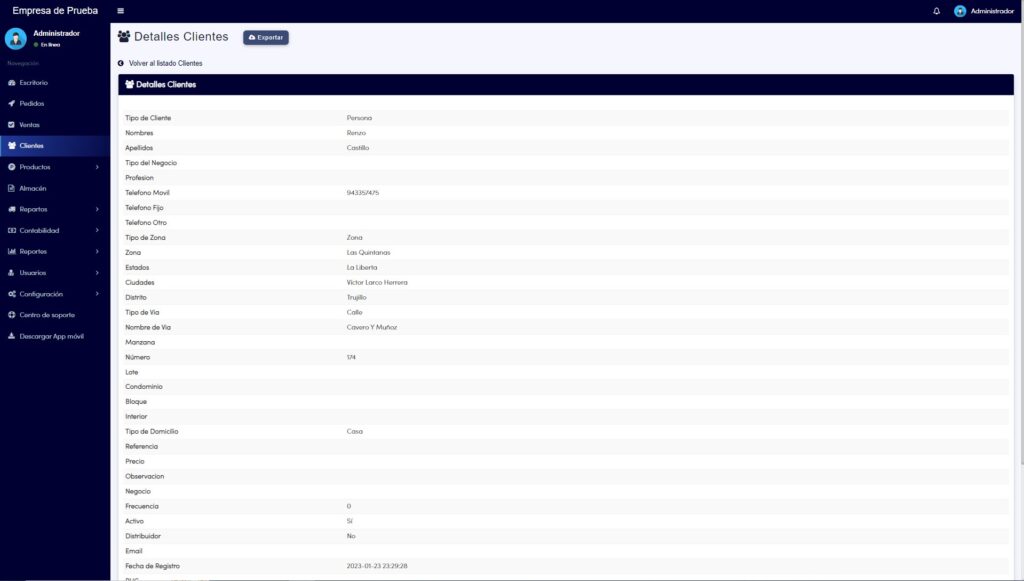
Details
When selecting this option, the following screen will appear:
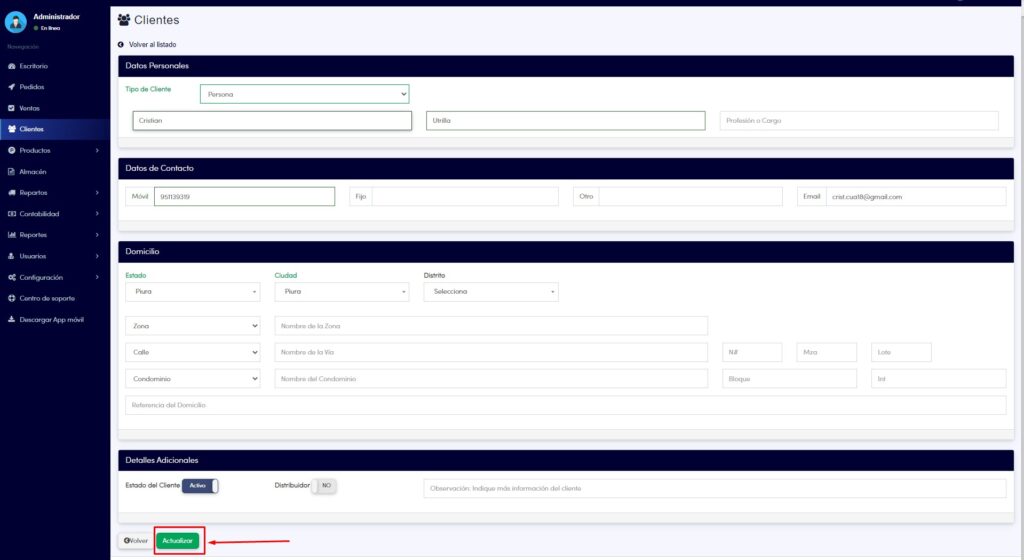
Edit
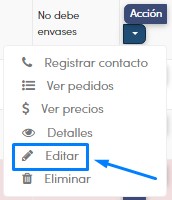
When clicking on this option, the following screen will appear.

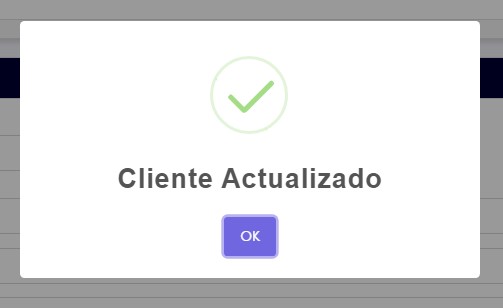
Once you have changed the desired fields, you just need to click on “Update”
The following “Customer updated” popup will appear and your data will have been updated.
Delete
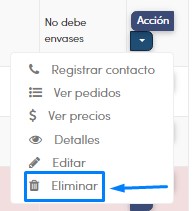
When clicking on this option, the following popup will appear.
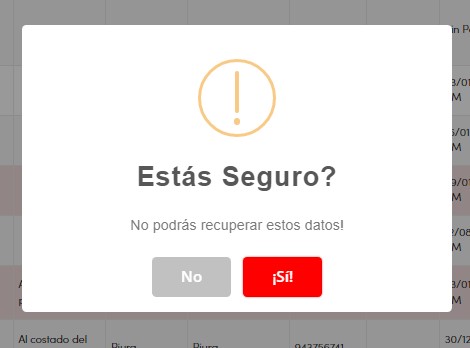
Where you will click “YES” if you want to delete the customer or “NO” otherwise. If you select “YES”, the following confirmation will appear.