Here you will learn everything you need to know
Welcome to this tutorial! On this occasion, we will teach you how to export contacts from Google to Yaku
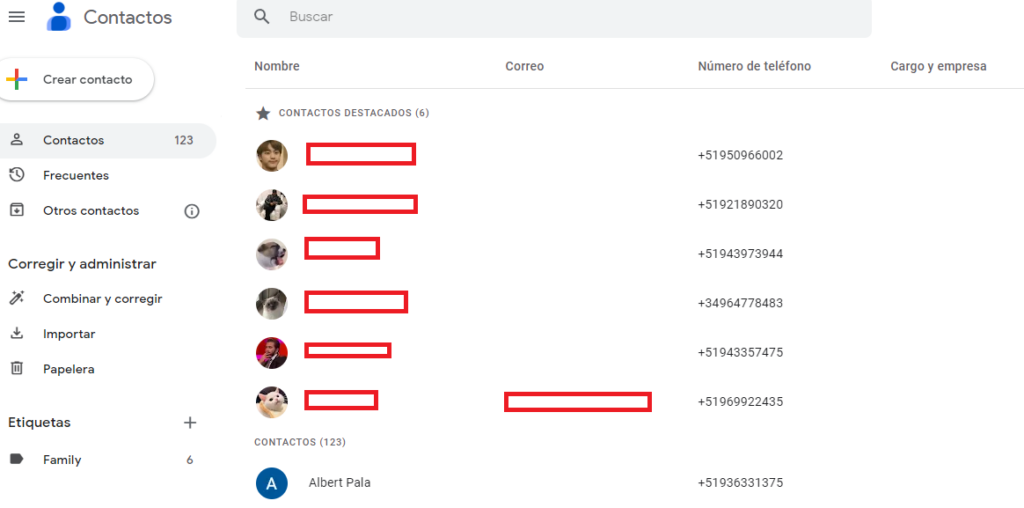
- First, we will go to: www.contacts.google.com, with our Google account:
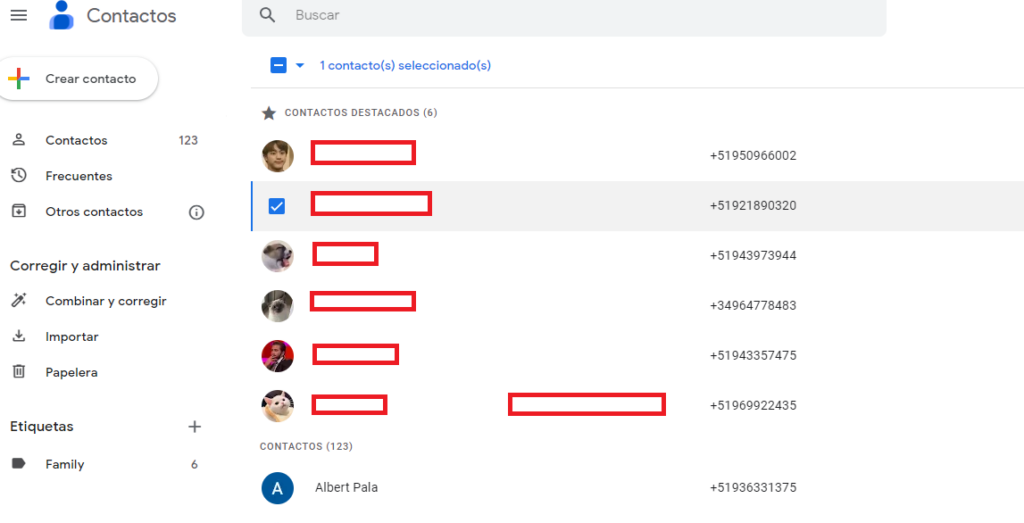
2. Next, we select any contact. We position the cursor over any contact and select it by clicking on the box that appears on the left side, so that it has a check mark:
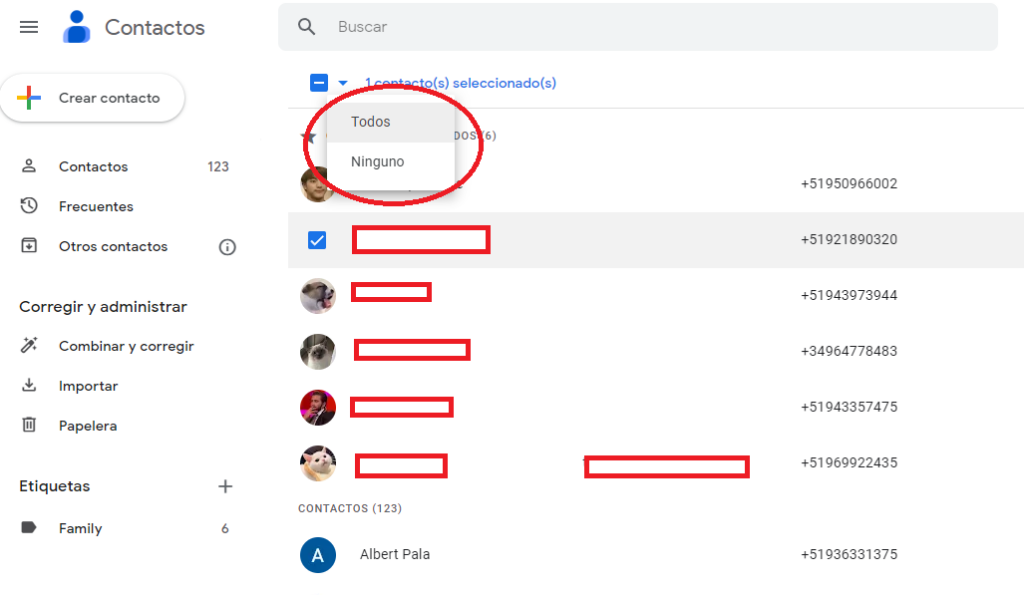
3. In this step, we will select all the contacts in our list. We will click on the box that appears in the upper left corner of the screen and then choose “All”:
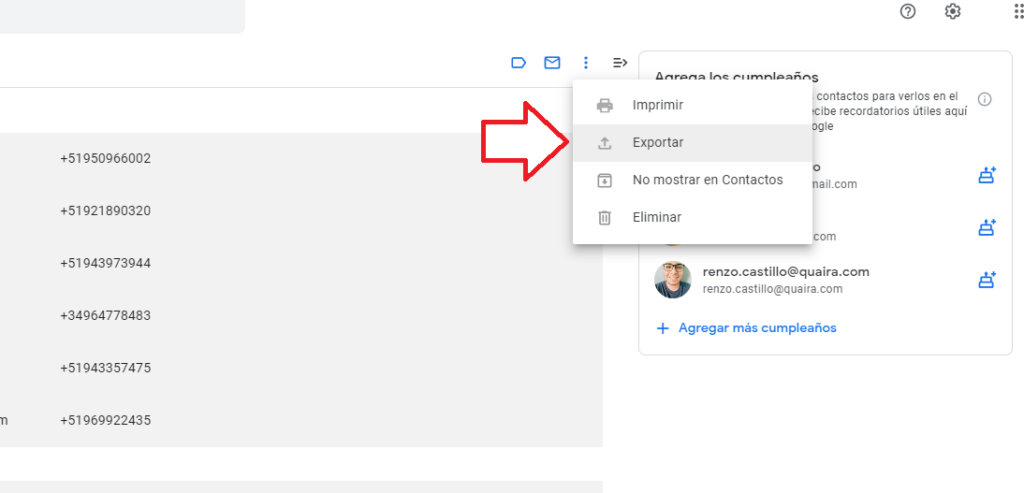
4. Now, we will export our contacts. We click on the three dots that appear in the upper right corner of the screen and choose “Export”:
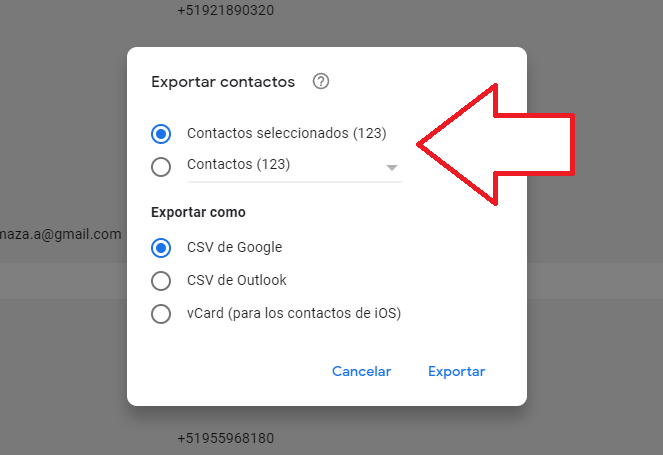
5. We choose to export our contacts as “Google CSV” and store that EXCEL document wherever we want:
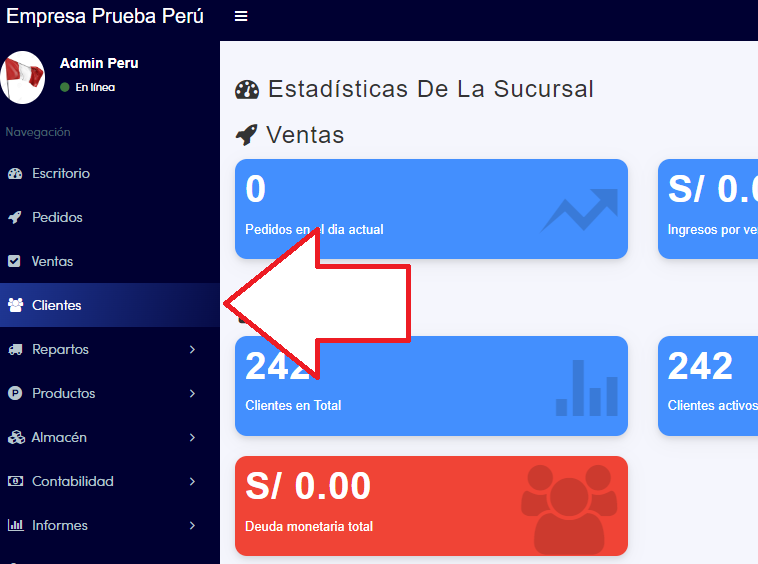
6. We log in to the Yaku platform with our credentials and go to the “Clients” tab:
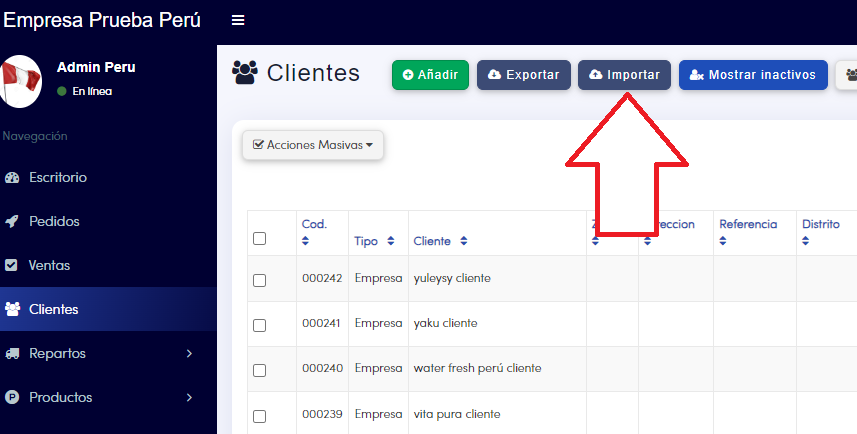
7. Once in this window, we will choose the “Import” option:
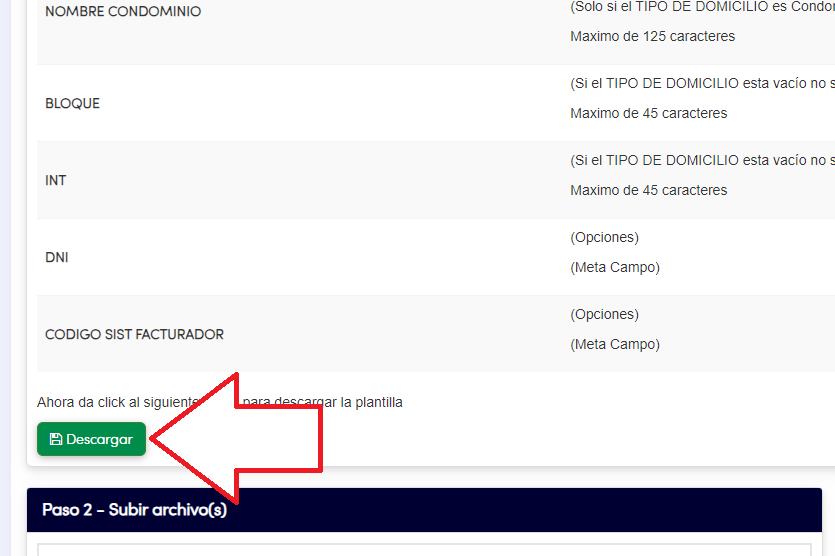
8. Once inside the “Import Clients” window, we will scroll down and download the Excel template:
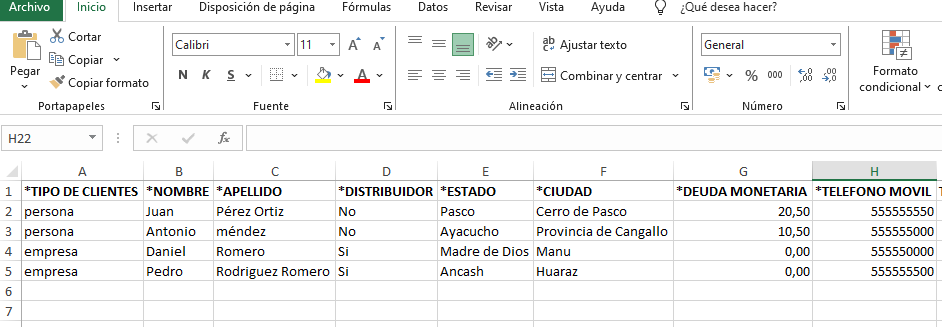
9. The template will look like this by default (note that the columns with * are mandatory for this process):
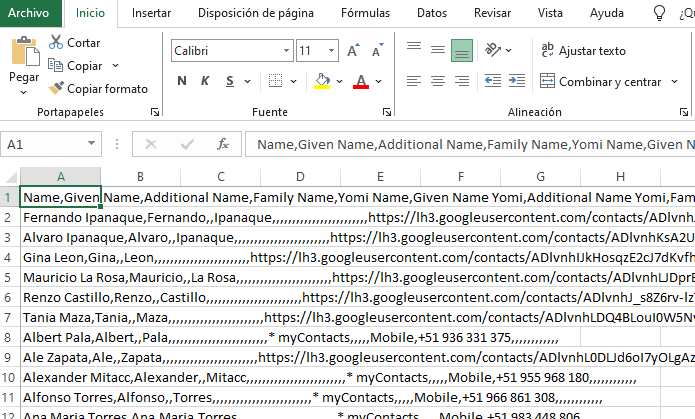
10. Now, we will access the Excel file that contains our Google contacts, it should look like this:
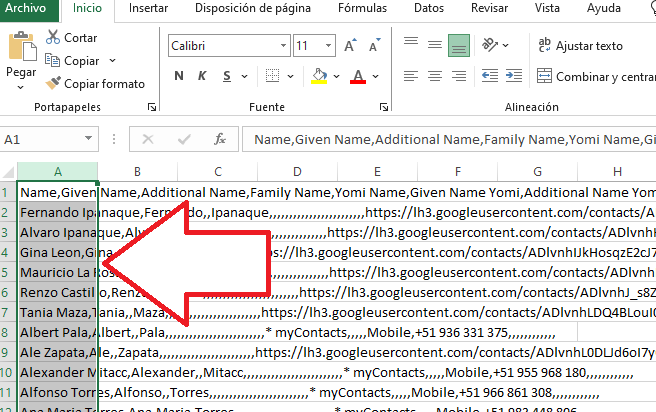
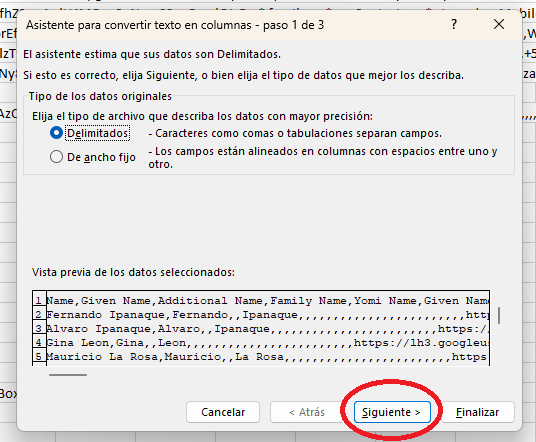
11. To organize this file, we select the entire first column. Then, we click on “Text to Columns” in the top menu. Once a new window opens, we choose “Next”:
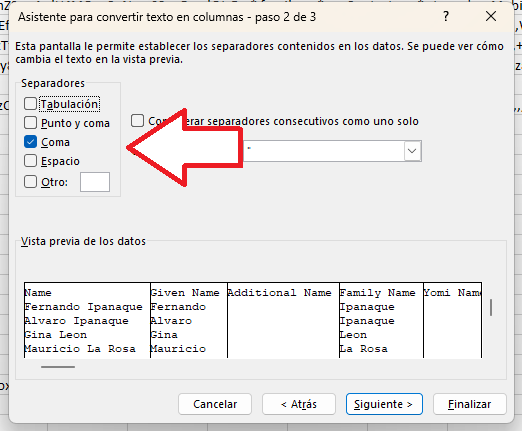
12. Once this window is displayed, we only need to leave the “Comma” option checked, this will result in our Google contacts list organized by columns:
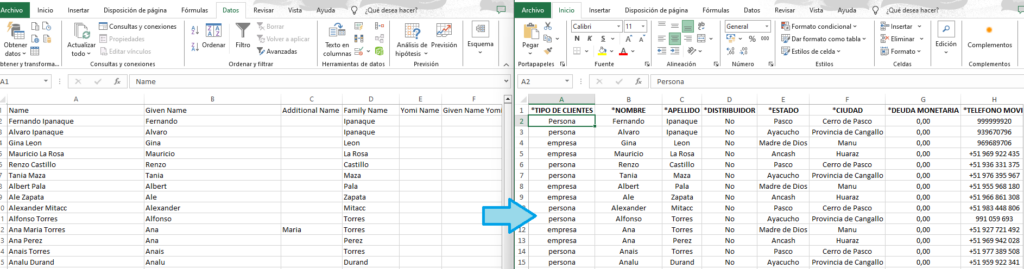
13. Once we have our Excel template, we must adjust/modify it according to the template we downloaded from the Yaku app (Note that the columns with * are mandatory to upload to the system)
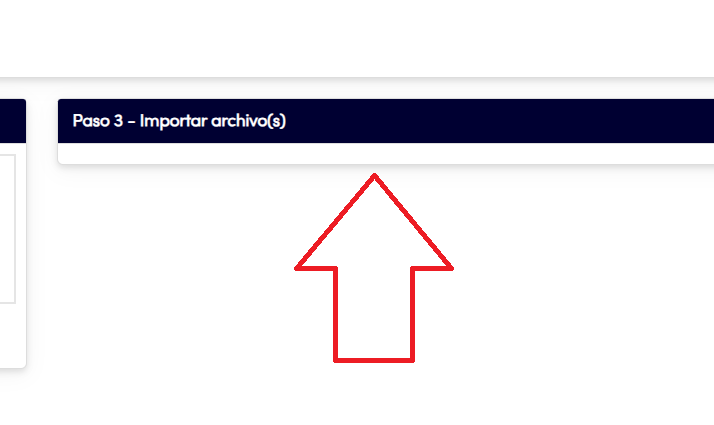
14. Now we will have to upload our template to the Yaku app. We go to the Clients>Import tab (located in the upper left corner of the screen), in this new window we scroll down and drag the document to the “Step 2 – Upload file(s)” box. Once it finishes loading, we complete the process with “Step 3 – Import file(s)”